

Post by Darth Maul on Dec 7, 2017 11:16:51 GMT
Original source: elfbot.vopo.pl/cavebot/
Edited By Darth Maul
Cavebot Tab Tutorial
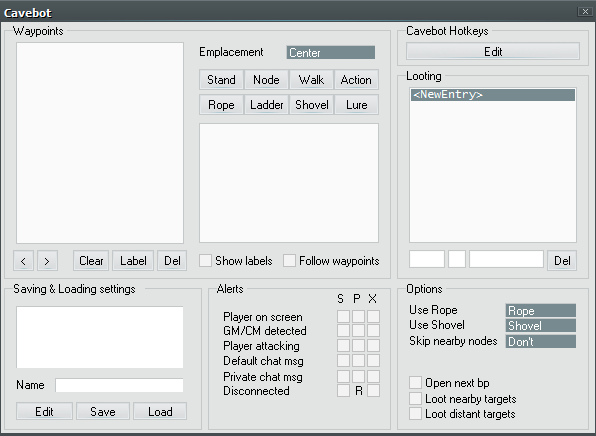
Waypoints:
To set a waypoint, simply click on one of the buttons, which are described below.
Emplacement - will be added to the position:
- Center - The current position of the player. This can also be found by using $posx, $posy, $posz, or $self.posx, $self.posy, $self.posz
- North - 1 square north of the player.
- East - 1 square east of the player.
- South - 1 square south of the player.
- West - 1 square west of the player.
- North-West - 1 square northwest of the player.
- North-East - 1 square north-east of the player.
- South-East - 1 square south-east of the player.
- South-West - 1 square south-west of the player.
Buttons:
- Stand - will attempt to get to this waypoint until it is reachable.
- Node - similar to the stand, but has the option to skip the node when, for example, we go a little chasing a monster. This option is available in Options. (see below)
- Walk - similar to the stand , but automatically skips the waypoint if the location is not reachable, or you encounter a monster close to this waypoint.
- Action - waypoint, which allows you to include a script in it. This is by far the most useful waypint, this allows you to create things like a depositer, refiler or a loot seller. You can use spells like 'exani hur' up / down. Most often you have to precede it with another waypoint e.g. stand.
- Rope - Attempts to use a rope at your current position, as such you typically want to use a stand waypoint ontop of the rope hole before using this waypoint.
- Ladder - Attempts to use a ladder at your current position, as such you typically want to use a stand waypoint ontop of the ladder before using this waypoint.
- Shovel - Attempts to use a shovel at the position posiion selected with the "Emplacement option".
- Lure - Used with the "Lure target" option with 'Targeting stance'. Sets the waypoints in which the monster should be peeled. The character will stand at the location indicated by the waypoint and will stand there until the monster dies. Check here for how to set luring up: elfbotscripts.freeforums.net/thread/216/create-lure-wps
- < - Select the previous waypoint.
- > - Select the next waypoint.
- Clear - Clears the entire list of waypoints. Be careful when using, because the saved waypoints will be lost forever.
- Label - Gives the selected waypoint a 'label', or a name. This is used so we can refer to this specific waypoint later in custom scripts. Most commonly used for depositer, refiller, return to exp after death, etc.
- Del - removes the selected waypoint.
Options for selection:
- Show labels - When a waypoint has a label added, its label is displayed instead of coordinates. A useful option.
- Follow waypoints - execute the cavebot file, including alarms, waypoints, scripts and looting.
Useful information:
I would recommend using a node without the option of skipping waypoints.
When using a waypoint override node , there may be errors such as skipping meaningful waypoints, not climbing stairs / teleports, etc.
To enter the stairs, we stand before them as if we wanted to enter them and for example when we click the arrow up we are entering them. If they are up from us then we choose "emplacement: north" and click on my node node.
Waypoints are added after the currently selected waypoint.
Waypoints are returned from the currently selected waypoint.
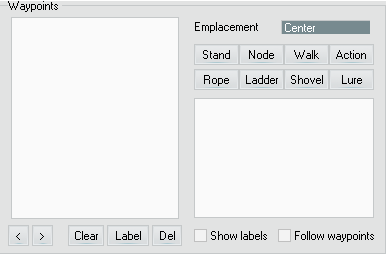
Cavebot Hotkeys:
After clicking "edit" a window with scripts assigned to our waypoints is displayed. Each script is added in a separate line. After adding the scripts, click Save \ Restart to ensure the scripts are set and working properly for the cavebot file.
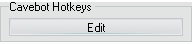
Looting:
To add a item to the looting, first click on <New Entry>; and then enter in sequence from the left to right (the boxes below).
Item ID. You can see by "looking" at an item in tibia or getting from the internet / from someone. See here: elfbotscripts.freeforums.net/thread/315/item-list
Location to place the look:
- 0-15: id window open backpacks.
- E: Finds free space and throws items there.
- E1: as above with the difference that it bypasses the first open window.
- G: throws item under the player.
To remove item from looting, select it and click "del".
Settings:
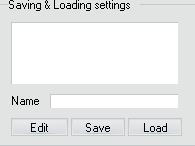
Used to save the entire cavebot.
First enter the name or search and then click one of the buttons.
- Edit - the settings editing window is displayed. Here we can manually type the waypoints, I do not recommend. When someone sends us waypoints in text form, we paste them here and then click Load Script . Then you can save.
- Save - saves the current data under the name entered or searched earlier.
- Load - loads the currently selected settings.
Alerts:
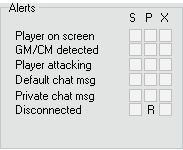
Alarms are used to inform us, stop cavebot, or turn off tibia.
- S - Plays an alarm. i.e. a sound
- P - pauses the cavebot.
- X - xlogs the player. Just turn off the tibia :-)
S and p can be combined.
- Player on screen - when there is a player on the screen who is not in our friends list.
- GM / CM detected - when GM / CM appears on the screen.
- Player attacking - when someone attacks us.
- Default chat msg - when someone posts something in the default channel.
- Private chat msg - when we get a private message.
- Disconnected - when we log out/get disconnected.
Options:
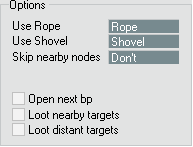
- Use rope - Set which rope to use.
- Rope - Uses the usual rope.
- Elvenhair rope - uses an elvenhair rope.
- Use shovel - Choose from which shovel to use.
- Shovel - Uses the usual rope.
- Light shovel - uses a light shovel.
- Skip nearby nodes - This option is used to bypass the node waypoints when e.g. too far away. I do not recommend using this because this option has a lot of errors..
- Open next bp - Opens another backpack when the current one is full.
- Loot nearby targets - Opens the bodies of monsters that we killed and are next to us.
- Loot distant targets - Remembers where we killed monsters and opens them only when we kill all the monsters on the screen.
